Use these expert tips to help you stay safe and avoid costly DIY home demolition mistakes that thwart your renovation budget.
HGTV shows and home renovation influencers make demo day look like a breeze. And sometimes, do-it-yourself interior demolition can be rewarding and budget-friendly. But before you grab your sledgehammer and start busting through walls, there’s a lot to consider.
Home demolition missteps can be costly. A single swing of the sledgehammer or crowbar can have catastrophic effects — even cause serious personal injury. We’ve compiled this list of things to know before you demo, so you can keep your home renovation budget on track (and avoid a trip to Urgent Care).
First, some reasons you might want to tackle your own demo in a home renovation
If your renovation budget is tight, doing the interior demolition yourself can potentially save cash. And for some, it’s fun to get your hands dirty. Keep in mind though, that while the labor may be free, there are still costs associated with DIY demolition — tools and materials, safety gear, waste removal and cleanup are all important things to consider before you begin demolition.
Still, if you’ve got the time, ambition, tools, and some construction knowledge, a DIY home demo could be a practical way to stretch your renovation budget.
Below are 4 important things to know before you demo.
How to prepare for construction and demolition: a 4-step checklist to help you prevent common DIY demolition mistakes
A successful home demo project is an organized one. So before you lace up your work boots and start swinging tools, follow these 4 key steps for DIY demo success.
1. Expect a mess
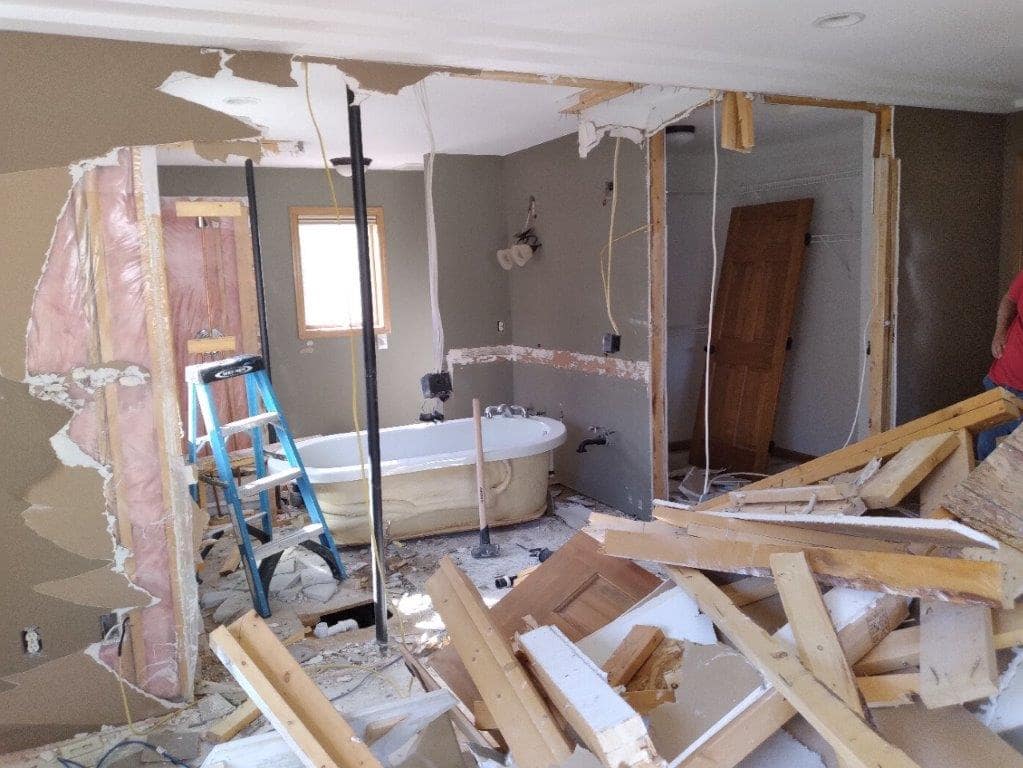
There’s no way around it — demolition is messy. When you pull up flooring and start removing walls, you’re likely exposing some unpleasant things: pet stains, evidence of rodents, insects, and of course, construction debris and dust.
It can quickly get overwhelming, especially if you’re living in the home during demo and construction. Prepare yourself for some level of chaos and create a soothing place to escape so you’re not completely overwhelmed once construction begins.
2. Gather tools and supplies
Any home project will likely require an extra trip or two to the hardware store. But some preparation before demo day can keep your project on track.
Common tools for home demolition include:
- Crowbar
- Chisel
- Hammer
- Utility knife (plus extra blades)
- Flathead screwdriver
- Electric drill and bits
To keep your demolition space tidy and help with cleanup, you’ll need:
- Contractor-grade trash bags
- A broom and dustpan
- A shop vac (make sure it has a filter for drywall and construction dust)
- A bucket (for plumbing mishaps)
- A dumpster or another plan for construction waste removal
Finally, safety gear for demolition:
- Heavy work gloves
- Protective eyewear
- Mask or respirator
- Work boots — preferably steel-toed
3. Safety first!
Speaking of safety, you’ll need more than just protective gear to ensure a safe DIY demo project. If you’re moving any walls, you need to know what’s inside them — and if they’re load bearing.
The easiest way to be sure? Keep a copy of your home’s blueprint nearby as you demo. Don’t have them? Consult a construction professional to help ensure you’re on the right track.
Other key ways to ensure safety on demo day
- Shut off power when working with or near electrical systems.
- Shut off the water if you’re tackling plumbing projects — and be sure you know where the shut offs are beforehand, just in case. Damage to a water line can quickly cause a big mess.
- Know where gas lines are. Shut them off if you’re nearby.
- Be sure everyone onsite understands the plan and knows how to use each tool.
- Block access to construction areas to keep pets and children safe.
The fact is, demolition can be dangerous. Ensure everyone onsite is prepared, wearing proper gear, and on the same page before the demo begins.
4. Make a plan
Once you’ve got your supplies lined up and you’ve taken proper safety precautions, you’re almost ready to begin. But don’t start swinging that sledgehammer just yet.
Take a moment to ask yourself a few key questions before you start demolition:
- Is there anything here worth saving? A mirror or light fixture that could be given new life with a coat of paint? A scrap of vintage wallpaper you could frame to honor your home’s heritage and origin story? Cabinets or hardware you could reuse somewhere else, like a garage or basement? Removing some items gently can save you money later on (and keep quality items out of the landfill).
- Is there anything someone else could use? Even if you don’t have a use for that pantry cabinet or wall sconce, someone else might. Consider listing items for sale or even free on sites like Craigslist or Facebook marketplace — your trash might just be someone else’s treasure. Or, if items are in good shape, consider donating them to a local Habitat ReStore to help build someone else’s forever home.
- Is there anything potentially hazardous in your home’s materials? Vintage homes often contain chemicals and substances we now know are dangerous for our health. Homes built before 1978 probably have lead paint on walls, ceilings, and trim. Homes built through the mid-1980s likely contain asbestos in the ceilings — both in acoustic ceiling and in the popcorn ceiling treatments — and potentially other surfaces as well.
When in doubt, test surfaces before you send dust into the air. And always wear a respirator mask to protect your lungs.
Vintage homes might also have fragile, corroded pipes or out-of-date electrical wiring. All can be addressed safely, but you’ll want to do your research and approach your home’s demolition with the proper safety equipment, knowledge, and tools.
Is DIY demolition really worth it?
Only you can answer that. Most home demolition projects aren’t a quick and easy day project, but they can save you some cash. Here’s breakdown of some common home projects — complete with starting costs and ability levels — to help you decide if you should DIY your interior demolition or hire a professional.
Not sure about a DIY demo? Don’t be afraid to ask for help
Home demolition can quickly feel overwhelming. The mess can take over your home, or you might discover something unexpected behind the walls that’s above your pay grade. No matter the reason, if you feel like you’re in over your head at any time during interior demolition, don’t hesitate to contact a pro.
A professional team will be able to complete the job more quickly than you, and they’ll handle the cleanup so you can get your spaces back faster.
Need help from construction and demolition professionals in the Twin Cities?
Our team can help you assess key features like load-bearing walls and architectural supports before you begin, to help avoid costly mistakes. We also have a full interior design team to help you make the most of your renovation once you’re ready to put things back together.


